Multi-Zone Reef Tank — Building a Five-Zone Reef System
In the early 1990s I moved from an apartment into a house, and for the first time I had room to build the reef aquarium I had been imagining. For three years reefkeeping had been a hobby. Now I wanted to build something that did more than look like a reef: I wanted a system in which corals and fish from different parts of a real reef could each live in conditions close to their own. The result was a staggered, roughly 500-gallon system of five display tanks and a sump, each tank representing a different reef zone. This page tells the story of why I built it and what it taught me. The other posts in this series cover each part of the build in detail.
Where did the idea come from?
For the two years before the move I had run a 40-gallon long reef tank. By the standards of the day it was crowded: about 35 fish and around 40 pieces of coral, from small colonies to propagated fragments. It was a successful tank, and a heavily stocked one teaches you a lot quickly. I learned how fish behave around corals when space is tight, which species hold territory, and how quickly a peaceful-looking community can turn on itself.
I had set out, as most hobbyists do, to build a scaled-down version of a living reef. What I learned the hard way is that you cannot reproduce the vastness of a reef in an aquarium only 18 inches deep and 48 inches long. My placement of corals, and my choice of fish and invertebrates, did not really reflect how a reef community is arranged. Corals that would never meet in the wild were placed side by side, and they fought. Small fish that would live metres apart on a reef were forced into the same few square feet, and they fought too. These territorial wars between encroaching corals and between small fish usually ended in death or near destruction for one side.
The more I read about real reefs, the clearer the problem became. A reef is not one habitat. It is a series of habitats arranged by depth, wave energy and light, and its corals and fish are sorted along that gradient. A single tank asks animals from the surf-battered crest, the shaded lower slope and the still lagoon to share one set of conditions. The solution I settled on was not to cram those zones into one box, but to give each its own.
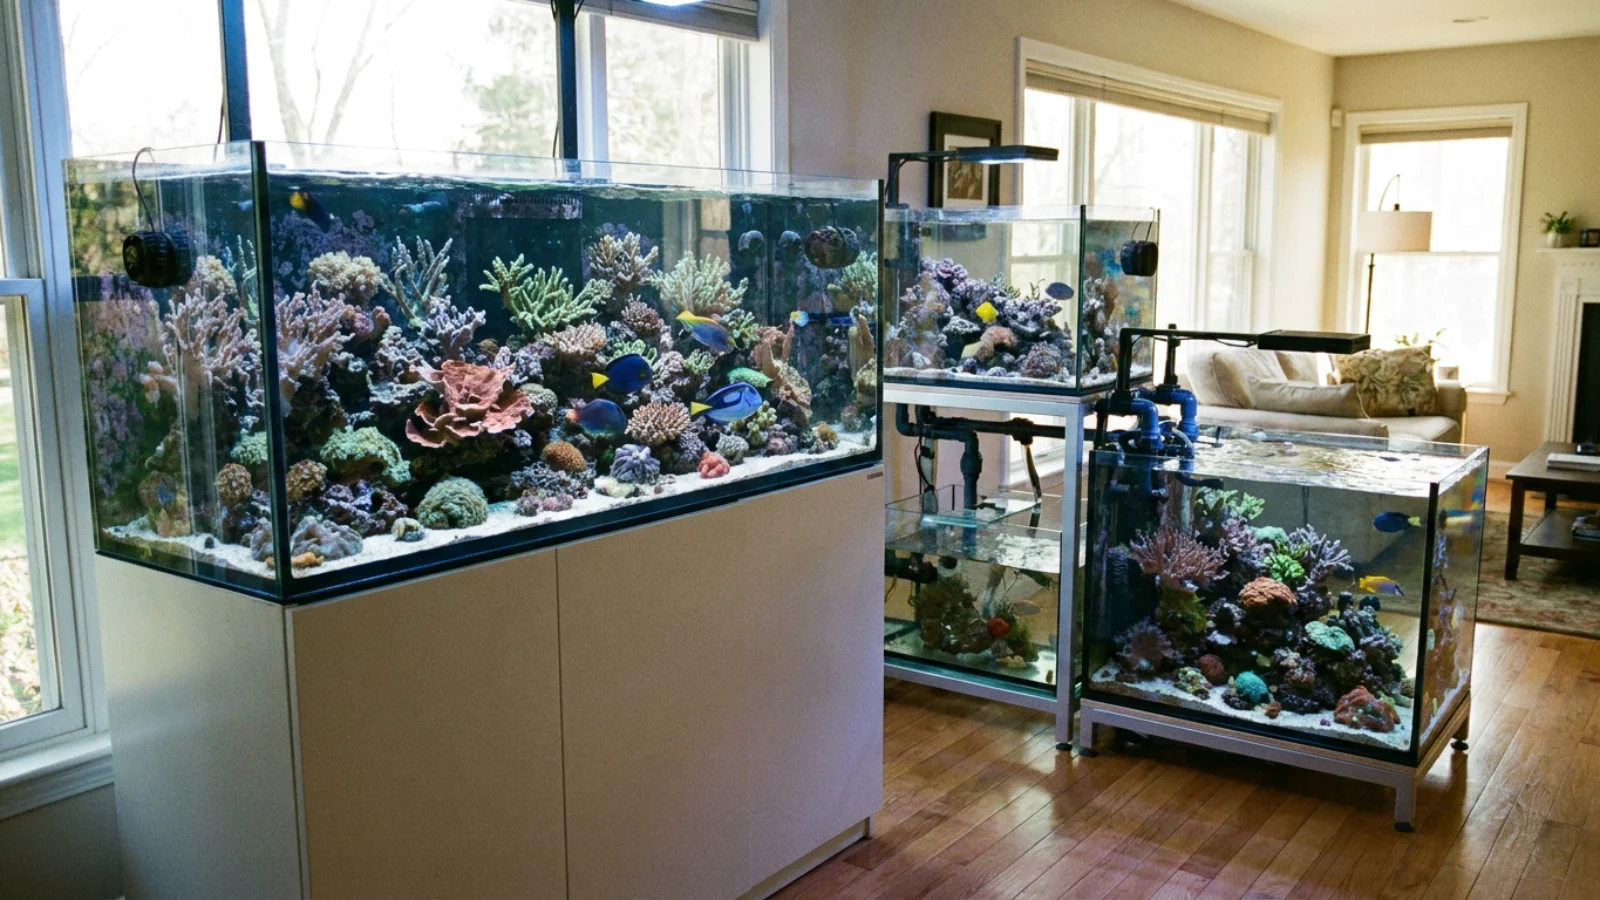
What is a multi-zone reef tank?
A multi-zone reef tank is a system in which separate aquariums, or clearly separated sections of one aquarium, are set up to imitate different zones of a coral reef. Each zone has its own lighting, water movement and community of animals, chosen to match a particular part of the reef. The tanks usually share one body of water through a common sump, so water chemistry and temperature stay linked, but light and flow can be tuned zone by zone.
The idea follows the way reef scientists describe reefs. Most corals are not spread evenly across a reef; they are more abundant and more successful in particular areas, and the pattern of zones is broadly similar on reefs around the world. Shallow, wave-swept areas favour robust, compact or short-branched corals; calmer, deeper slopes favour plating and more delicate growth forms; sheltered back reefs and lagoons hold their own mix of corals, seagrasses and sediment dwellers. A multi-zone system tries to capture that sorting.
How long did the planning take?
Nearly two months of research and planning went into the design before anything was built. My goal was a multi-level reef aquarium system with dedicated reef zonation. Everything I had read and seen convinced me that the only way to have some reef species not just survive but thrive and reproduce was to engineer conditions similar to their natural habitat. That meant thinking about each zone separately: how much light reaches it in the wild, how hard the water moves, what grows there and what eats what.
I read the reef zonation literature available at the time. The most detailed description I found split a reef into eleven zones, from the lower slope and upper slope through the reef front, reef flats, back reef margins and slopes, intertidal mudflats and the lagoon. The boundaries between those zones are debatable, but the unique character of several of them is not. I chose five to build.
Which five zones did I build?
I chose the reef front or crest, the upper slope, the lower slope, a back reef margin and the lagoon. The choice was about getting the most biodiversity for the space and the money. Some zones would make poor aquarium habitats. The outer reef flat, for example, is pounded by waves and has relatively few residents compared with other parts of the reef, so it would have added a tank without adding much life.
The crest held branching small-polyp stony corals in strong, turbulent water under bright light. The upper slope moved from branching SPS into large-polyp stony corals. The lower slope, under bluer light, held leathers, gorgonians, Palythoa and Zoanthus. The back reef was a collection of encrusting and plating SPS, and the lagoon was planted with marine grasses and mangroves. The details of each zone are on the reef tank zones page.
How was the system laid out?
The system was built around five main display aquariums and one sump, with a total volume of about 500 gallons. I designed a staggered layout for viewing impact. The upper slope and lower slope tanks each dropped about 6 inches below the reef crest tank, and the back reef and lagoon followed the same pattern. Staggering the front three tanks gave the appearance of a single wall of reef about 4.5 feet high and a little over 6 feet long. The lagoon returned to form an L shape together with the back reef, off the end of the reef crest tank.
All of the tanks were custom-made, all-glass aquariums, each drilled with a small triangular overflow in one corner. The whole system lived in a basement room that I gutted and rebuilt for the project, with dedicated electrical circuits. The dedicated reef aquarium room post covers the room, the stands and the floor work.
How was it lit?
Lighting was the most time-consuming part of the project and the most rewarding in terms of what I learned. My 40-gallon reef had been lit by six 110-watt very high output fluorescent tubes in a hood I designed and built myself. For the new system I wanted to match the colour temperature and intensity to each zone. The crest ran two 6,500 K 175-watt metal halides; the upper slope a 14,000 K 175-watt halide; the lower slope a 20,000 K 175-watt halide; the back reef a 10,000 K 175-watt halide; and the lagoon two 5,500 K 175-watt halides. Over time I increased intensity over the shallow tanks. The full story is in reef tank lighting.
How was water moved and filtered?
Circulation was the area where my first design fell short. I used two external pumps rated at about 1,200 gallons per hour, chosen as external units to keep heat out of the water. The main pump fed the three front tanks and the second fed the back reef and lagoon. In practice the system was underpowered and I had to add more pumps and wave makers. In hindsight I should have run three return pumps, with the second serving the back reef alone and a smaller third pump serving the lagoon. The water flow post covers the filtration, heating and chilling in detail.
Why separate tanks instead of one large tank?
A single large tank would have been simpler and cheaper. It would also have meant compromise everywhere. Separate tanks let me run very different light over each zone without spill-over washing everything out to the same level, though in practice some light did spill from one tank to the next because they were so close together. They let me set flow from violent at the crest to almost still in the lagoon. And they kept aggressive corals and territorial fish from the zones where they would do damage.
They also let me watch something I could never see in a mixed tank: how the same species behaved under different conditions. On a few occasions I moved a coral out of its expected zone because it coloured up better under the light of a neighbouring tank. Those experiments taught me as much about coral colour and light as any book. The trade-off was complexity. Five tanks meant five sets of lights, five overflows and many more ways for things to go wrong.
What did the system teach me about coral placement?
Before I fixed any coral permanently with epoxy, I experimented with its position, sometimes for months, looking for the spot where it grew and coloured best. Placement turned out to depend on far more than which zone a coral came from. Colour, polyp extension and growth all responded to small differences in light and flow within a tank. Contrast mattered visually as well: a mauve or brown coral placed behind a yellow or pink one makes both stand out, and mixing tight-branched SPS with long-branched or plating corals gives a reef depth and texture. The aquascape post goes into this in detail.
What did I get wrong?
Plenty, and the lessons are a large part of why these posts exist. Circulation was underpowered at the start. The sand beds were too shallow to work as true deep sand beds. I built the rockwork up against the back glass, so any serious change meant tearing it down, and I paid too much for large pieces of premium live rock when cheaper base rock would have looked the same in time. The room should have had ground-fault protection on its circuits from the start, and the stands should have been finished with a water-resistant panel. Starting with deionised tap water alone also caused trouble until I moved to reverse osmosis followed by deionisation. Each of these is covered in its own post.
None of these mistakes were disasters, but each cost time and money to fix. The best advice I can give anyone planning a large system is to assume that you will want to change things, and to build so that you can.
Would I build a multi-zone system today?
The principle holds up well, and in some ways it is easier to apply now. Modern LED fixtures let you set spectrum and intensity per tank or even per section of a tank, and controllable pumps let you give each zone its own pattern of flow without extra plumbing. Many reef keepers now achieve something similar with linked systems: a display tank sharing water with a frag tank, a refugium and a coral grow-out tank, each lit and plumbed differently.
What has not changed is the idea behind it. A reef aquarium works best when it is designed around the needs of the animals rather than the other way round. If you want a coral from the crest and a coral from the lower slope to both thrive, you either need two very different spots in one tank or two different tanks. A multi-zone system is simply the second option taken seriously.
How can you apply the multi-zone idea to a single tank?
You do not need five tanks to use zonation. In a single display, the upper third under the strongest light and flow can play the role of the crest, the middle the upper slope, and the shaded lower rock and sand bed the lower slope and back reef. Choosing corals by zone and placing them accordingly, rather than buying whatever looks best in the shop, avoids many of the chemical wars and shading problems that plague mixed reefs. A refugium with macroalgae, mangroves or seagrass can stand in for the lagoon.
The same thinking applies to fish. Choose species that would share a reef zone in the wild, give them the shelter and swimming space that zone provides, and add them in an order that limits territorial disputes. The fish selection post covers this in more detail.
What does a system like this cost to run?
More than people expect, and not only in money. Seven metal halides over five tanks, two large external pumps, a heater, a chiller, a skimmer and the wave makers all drew power around the clock, and the chiller and heater sometimes worked against each other with the seasons. Salt, test kits, replacement bulbs and the cost of reverse osmosis water added up. The biggest cost, though, was time. Five tanks meant five sets of glass to clean, five overflows to check and many more corals to watch. Anyone planning something similar should budget honestly for both before buying the first tank.
Where does the series go from here?
The posts in this section follow the build roughly in order: the room and stands, the reef zones, water flow and filtration, lighting, substrate and live rock, aquascaping, salinity and water quality, and fish selection. Alongside my own experience, each post adds up-to-date general guidance so it is useful whether you are planning a single tank or a multi-tank system. Where my early-1990s choices have since been overtaken by better equipment or better understanding, I say so.
From My Reef Tank: My Original Notes
My past two years had been dedicated to a 40 long reef aquarium, with about 35 fish and 40 pieces of coral ranging from small colonies to propagations. In such a heavily populated aquarium I was able to learn some interesting lessons about the behavior of fish in coral, especially in a confined reef space.
I set out like many hobbyists do, to create a scaled down version of a living reef in my aquarium. Although my first attempt was very successful I wanted to do something on a larger scale. As time went on, I learned more about living reefs and coral. This knowledge led me to start thinking outside of the box on a few ideas about my next reef aquarium.
Many simple activities like placement of the coral in the reef aquarium, and my selection of fish or invertebrates that mimicked the reef community was not very accurate. Well I soon learned the hard way that I could not really imitate the vastness of a marine reef in an aquarium merely 18" deep and 48" long.
Many territorial wars between encroaching corals, and small fish usually resulted in death or near destruction of these reef tank mates. I would not settle for a glimpse of nature’s reef, I wanted to create a micro eco-system in my home aquarium and I had my work cut out for me.
Nearly two months had passed and my reef research and planning were finished. My objective was to create a Multi Level Reef Aquarium System, but not just any system, one that actually had dedicated reef zonation. After everything I had read and witnessed up to this point it had convinced me that the only way to have some of these coral reef species thrive and reproduce would be to engineer aquarium conditions similar to their natural habitat. Rather than attempting to have an amalgamation of reefs zones all in one tank I set out for a multi zone reef aquarium system.
What is a multi-zone reef tank?
A system of linked tanks, or separated sections, each set up to imitate a different reef zone with its own light, flow and animals.
How big was the system?
About 500 gallons across five display tanks and one shared sump.
Which reef zones did it include?
The reef crest, upper slope, lower slope, a back reef margin and a mangrove and seagrass lagoon.
Why use separate tanks?
To give each zone its own light and flow and keep corals and fish from different zones from fighting.
Do the tanks share water?
Yes. They drained to one sump, so chemistry and temperature were linked while light and flow differed.
Can I use zonation in one tank?
Yes. Treat the top, middle and bottom of the rockwork as different zones and choose corals to match.
- Sheppard, C. R. C., Davy, S. K. and Pilling, G. M. (2009), The Biology of Coral Reefs, Oxford University Press
- Veron, J. E. N. (2000), Corals of the World, Australian Institute of Marine Science
- Delbeek, J. C. and Sprung, J. (1994), The Reef Aquarium, Vol. 1, Ricordea Publishing
- Blane Perun, build notes for the multi-zone reef system (early 1990s)
Blane Perun has been exploring Earth’s oceans and marine life for over 25 years. Founder of TheSea.Org in 1999, underwater photographer, coral aquaculture pioneer, and explorer of 80+ countries.
About Blane Perun →